Soft Glam Bridal Makeup: How to Get the Glow Without the Grease

Your wedding day makeup should look beautiful at the ceremony and still hold up during the last song of the reception. Soft glam bridal makeup does exactly that when you build it correctly. It gives you luminous skin, defined eyes, and a polished lip without tipping into heavy or overdone. This guide walks you through every step, from skin prep to product choices, so you walk in confident and stay that way all day.
1. What Soft Glam Bridal Makeup Actually Means (And What It Doesn’t)
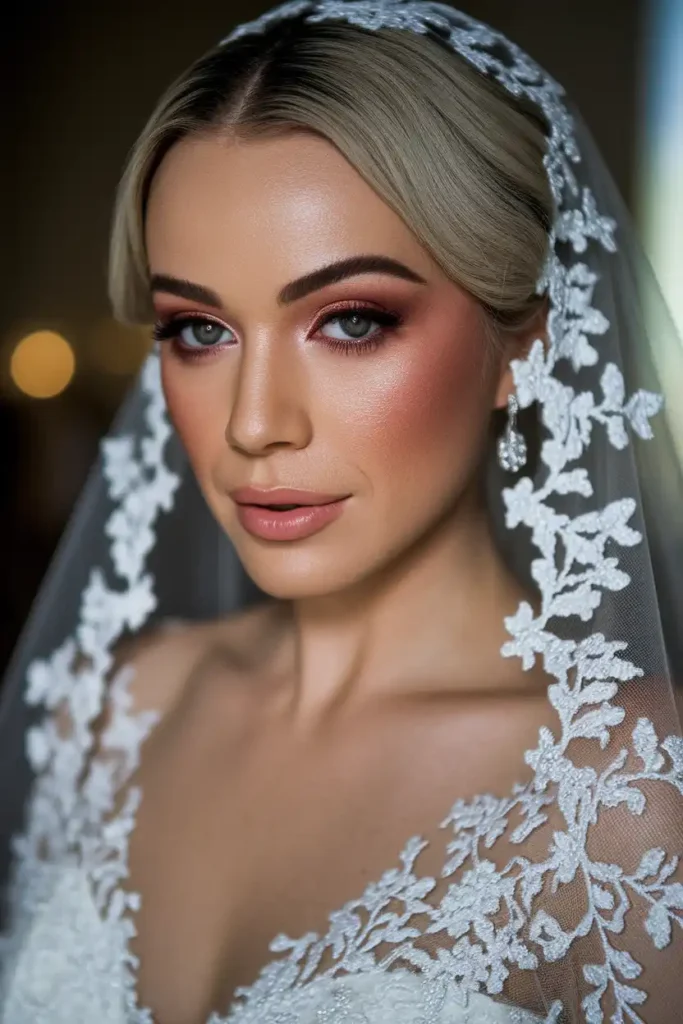
Soft glam bridal makeup sits between “no-makeup makeup” and full glamour. It means skin that looks healthy and lit from within, eyes that are defined without being dramatic, and a lip that completes the face without taking over. It is not matte, it is not flat, and it is definitely not the heavy contouring you see on editorial shoots.
If you have been scrolling Pinterest and saving looks that feel wearable, warm, and timeless, you are already drawn to this style. The goal is to look like the best version of yourself, someone your partner will recognize when you walk down the aisle. Keep that as your north star when making every product and shade decision.
2. How to Build a Skin-Prep Routine That Makes Your Makeup Last All Day
Your makeup is only as good as the skin underneath it. If you skip prep, even the most expensive foundation will crease, separate, or oxidize before your first dance. Start with a hydrating serum the night before, follow with a moisturizer suited to your skin type in the morning, and let everything absorb fully before you touch any base product.
On the day itself, apply a thin layer of a silicone-free primer and wait five minutes. This step is non-negotiable. Silicone primers can cause long-wear foundations to pill, and you do not want that on camera. If your skin leans dry, a hydrating primer mixed with a drop of facial oil gives the foundation something smooth to grip onto without looking greasy.
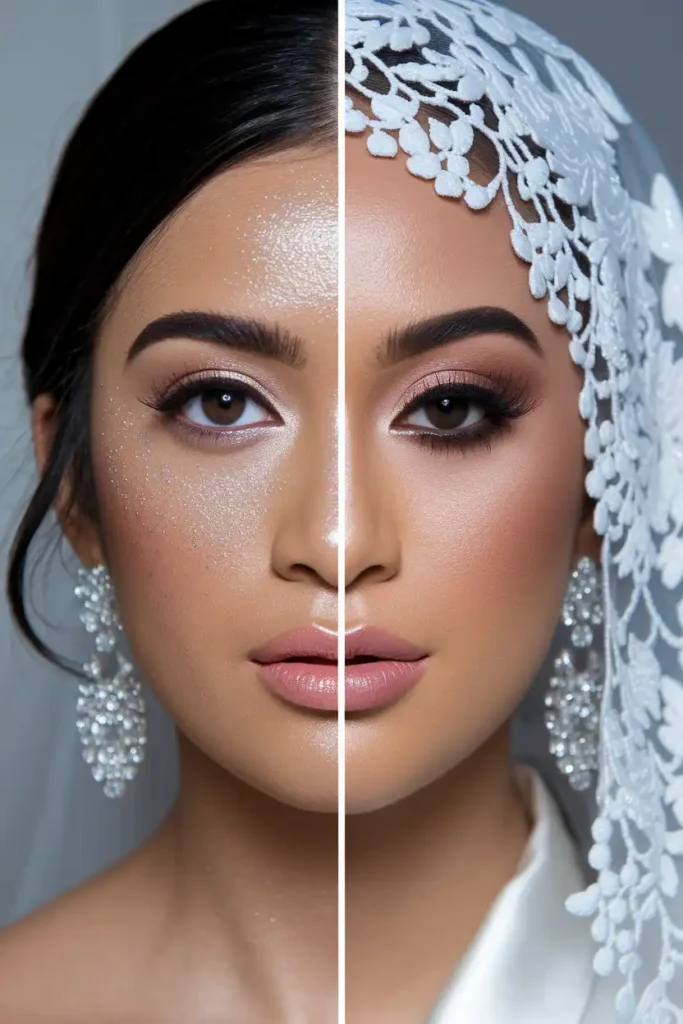
3. Choosing the Right Foundation Finish for a Bridal Glow That Does Not Look Oily
The words “glow” and “grease” get mixed up constantly in bridal prep conversations. A true bridal glow is controlled luminosity, meaning light bounces off your skin in the right places. A greasy finish means your entire face reflects light, which photographs as shine and reads as sweat on camera.
To get this right, reach for a satin or natural-finish foundation rather than anything labeled “dewy” or “full glow.” Dewy formulas are beautiful in person but tend to migrate in humidity, heat, and emotion. Set the areas that naturally get oily (your T-zone, around the nose, chin) with a micro-fine setting powder, and leave the higher planes of your face, your cheekbones, brow bone, and nose bridge, bare so the luminosity stays intentional.
4. How to Achieve a Long-Lasting Soft Bridal Look That Stays Through the Entire Reception
A wedding day is long. You are talking eight to twelve hours of emotion, movement, heat, and touching your face more than you realize. The products you layer and the order you apply them in determine whether your look lasts through the vows or falls apart by cocktail hour.
Here is a reliable layering sequence for longevity:
- Primer applied to clean, moisturized skin and fully absorbed before foundation
- Long-wear foundation set in sections as you go, not all at once at the end
- Cream blush and highlighter applied before any powder so they melt into the skin
- Translucent setting powder pressed, not buffed, into oily zones only
- Setting spray used in two light layers: one mid-makeup, one at the end
That final setting spray layer is the step most brides skip. Do not skip it.
5. The Best Way to Use Setting Sprays to Keep Your Bridal Makeup Fresh All Day
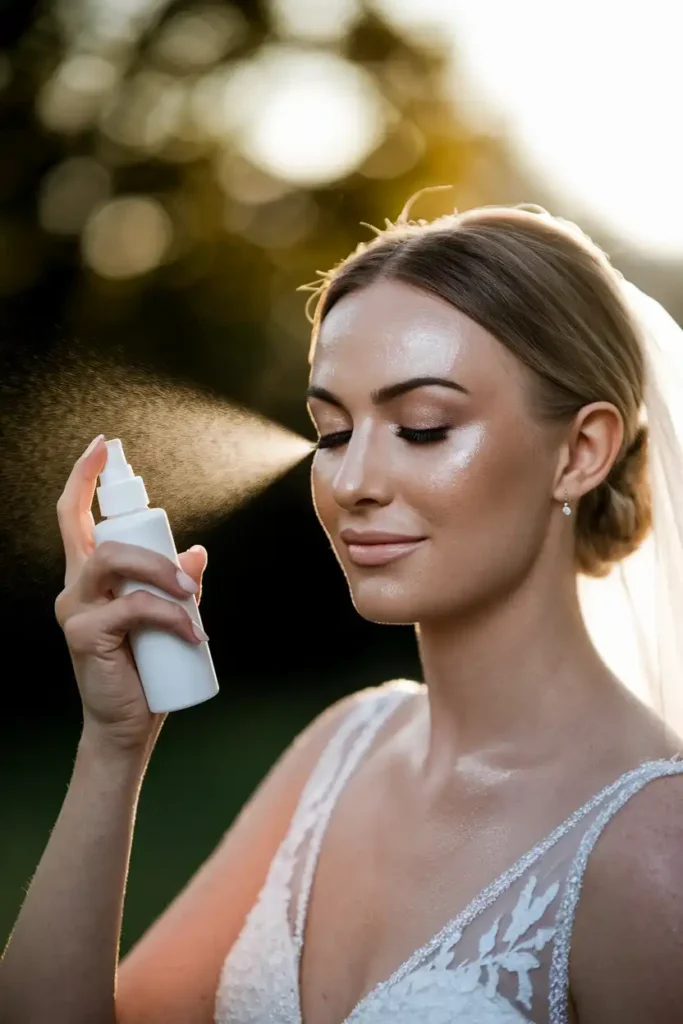
Setting spray is not just a finishing touch. Used correctly, it bonds your makeup layers together and dramatically extends wear time. Hold the bottle eight to ten inches from your face and mist in a figure-eight or X pattern. Do not fan your face after, let it air dry so the formula sets without disrupting your powder.
For a wedding, use setting spray twice. The first application comes after your powder and before any cream products like blush or highlight, this helps lock in the base. The second application is your final step before you leave the makeup chair. If you tend to get oily, carry a travel-size bottle and do a light refresh mist over blotting paper mid-reception. It reactivates the formula without adding product or making you look freshly touched up.
6. Tips for Making Bridal Eye Makeup Tear-Proof and Smudge-Proof
You will cry. Maybe during the vows, maybe when you see your parents, maybe during a speech. Plan for it and your makeup survives it. The biggest culprit behind raccoon eyes is not the eyeshadow, it is mascara and lower lash liner migrating when your eyes water.
Follow these steps to keep your eye makeup intact:
- Primer your lids with an eyeshadow primer before any shadow, this prevents creasing entirely
- Use waterproof mascara on lower lashes only, and a tubing mascara on upper lashes for smudge-proof wear
- Tight-line your upper waterline with a waterproof liner instead of applying liner along the lower lash line
- Skip lower lash liner altogether if your eyes water easily; use a soft brown shadow with an angled brush for definition instead
- Blot eye area gently with a tissue before the ceremony if you feel moisture building up
A good waterproof mascara and the absence of lower liner will save your photos.
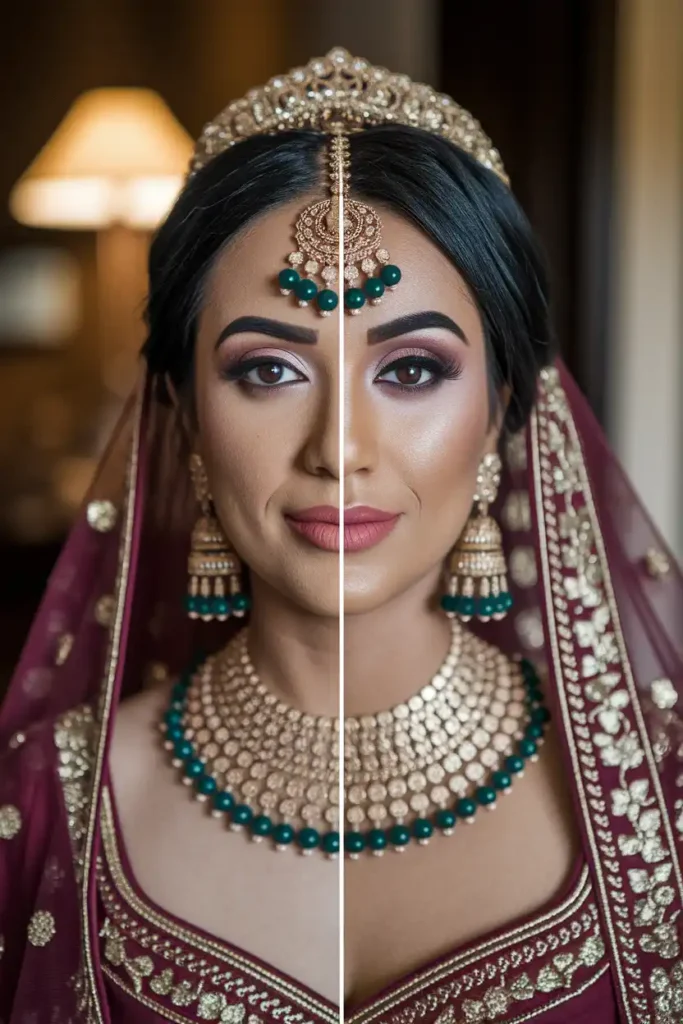
7. How to Pick Eyeshadow Shades That Flatter Every Skin Tone
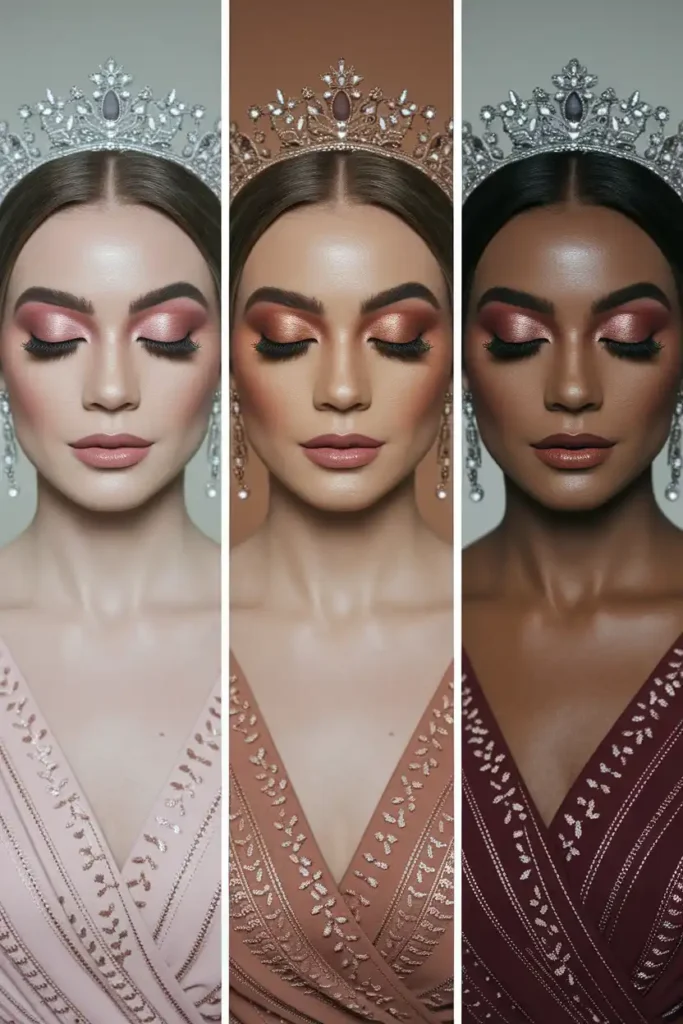
Eyeshadow shade selection is where a lot of brides go wrong by following trends instead of what actually works for their coloring. The rule is simple: warm undertones in your skin respond best to warm shadow tones, and cool undertones are balanced by cooler, ashier shades.
Here is a quick guide by skin tone:
- Fair skin with pink undertones: Soft mauve, dusty rose, taupe, champagne
- Fair to light skin with neutral undertones: Warm beige, soft gold, blush pink, light brown
- Medium skin with olive or golden undertones: Terracotta, copper, warm bronze, caramel
- Medium to tan skin with warm undertones: Rust, cinnamon, rose gold, earthy brown
- Deep skin with warm undertones: Burnt sienna, deep copper, mahogany, rich gold
- Deep skin with cool or neutral undertones: Deep plum, burgundy, espresso, charcoal with a sheen
Avoid anything with a white or silver base if you have warm undertones; it will look ashy and disconnected from your complexion.
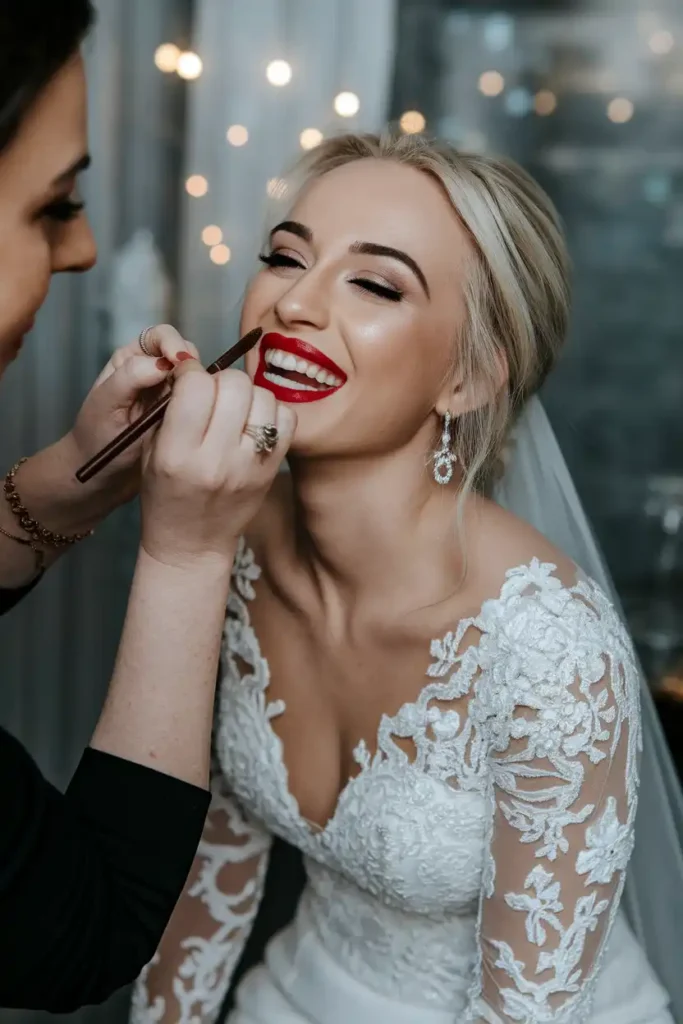
8. Lipstick Shades for Bridal Makeup That Work With Your Skin Tone and Dress Color
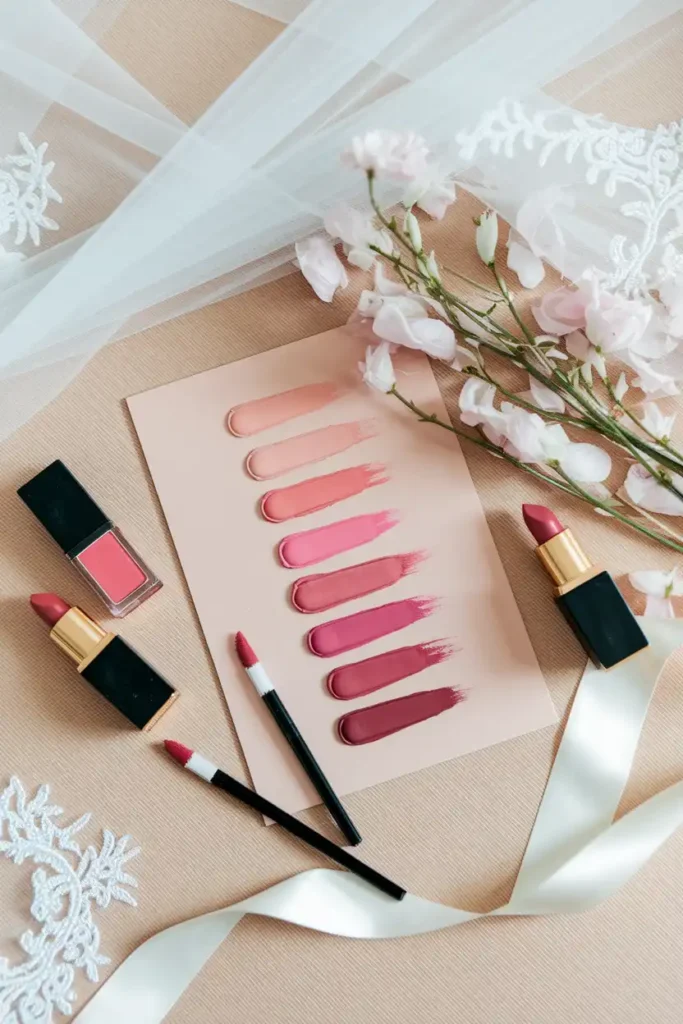
Choosing a wedding day lip color feels high-pressure because it is permanent in photographs. The safest approach is to go one to two shades deeper than your natural lip color. This gives enough definition to read on camera without looking like a costume.
Here is a shade guide based on skin tone:
- Fair skin: Peachy nude, soft pink, muted rose, light berry
- Light to medium skin: Warm pink, dusty mauve, natural rose, soft coral
- Medium to tan skin: Warm nude-brown, terracotta, rose-mauve, muted brick
- Deep skin: Caramel nude, deep berry, warm burgundy, raisin brown
If you are wearing a bright white dress, avoid very pale nudes as they can wash out your face in photos. If your dress is ivory or champagne, warm pinks and roses are more harmonious than cool reds. Always do a test photo in your wedding lighting before finalizing your lip color.
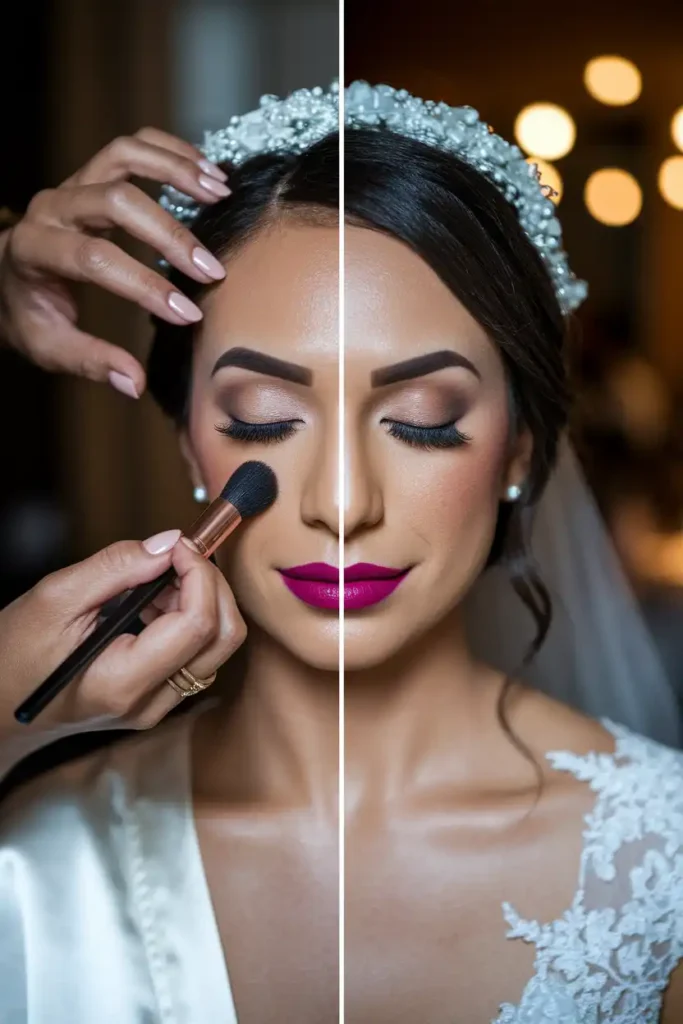
9. How to Contour and Blush Without Making Your Skin Look Cakey or Overdone
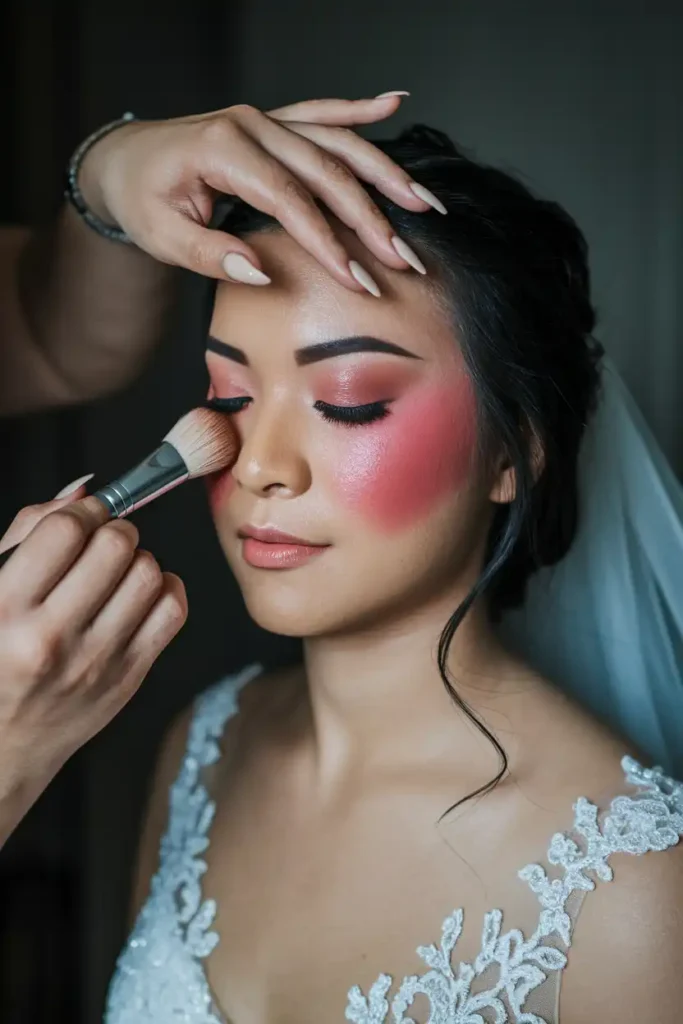
Contouring has its place in bridal makeup, but it needs to look like shadow, not a stripe of brown product. For weddings, skip heavy powder contour and work with cream formulas instead. Cream contour warms into the skin and photographs far more naturally than powder, which can look patchy under flash.
Apply cream blush first to the apples of your cheeks and blend upward toward your temples. Then, if you want to add dimension, use a matte cream contour product one to two shades deeper than your skin tone along the sides of your nose and just below your cheekbones. Blend everything with a damp sponge. The goal is that someone looking at your photos sees your face, not your technique.
10. Latest Trends in Bridal Makeup for 2026 Weddings Worth Knowing
If you are getting married in 2025 and want your look to feel current without being trendy in a way you will regret, these are the directions actually showing up in bridal bookings right now:
- Glass skin base: A focus on skin texture over coverage, using light-coverage skin tints and strategic highlighting
- Strawberry makeup: Warm red-pink tones on cheeks, lids, and lips for a sun-kissed flush
- Brown-toned soft glam: Replacing black liner and cool shadows with chocolate brown liner and caramel tones throughout
- Glossy lids over matte: A light, non-sticky gloss applied to the center of the lid for dimension
- Soap brows: Full, natural, brushed-up brows replacing heavily filled arches
- Minimal under-eye: Skipping heavy concealer and embracing a more natural, slightly undone under-eye finish
None of these trends require a complete overhaul of a classic bridal look. Pick one or two elements that feel like you, and build around those.
11. Common Mistakes to Avoid With Bridal Makeup That Can Affect Your Photos
The most common bridal makeup mistakes are not about skill, they are about not accounting for how makeup reads on camera versus in person. Flash photography is unforgiving, and certain products that look beautiful in a mirror become problems in photos.
Watch out for these specific issues:
- Flashback: SPF-containing powder and certain setting sprays reflect flash and cause a white cast in photos; always check that your powder is camera-ready
- Visible jaw line: Blend foundation down the neck and check your look in natural light and under artificial light before leaving the chair
- Over-highlighted cupid’s bow: Heavy lip liner above your natural lip line looks natural in the mirror but reads as drawn-on in close-up photos
- Too much shimmer below the brow: It photographs as shine and can make the eye area look puffy
- Skipping a touch-up kit: Carry blotting papers, your lipstick, a small powder, and a cotton swab for the day
Get photos taken of your makeup trial under different lighting conditions. That is the most honest test you have.
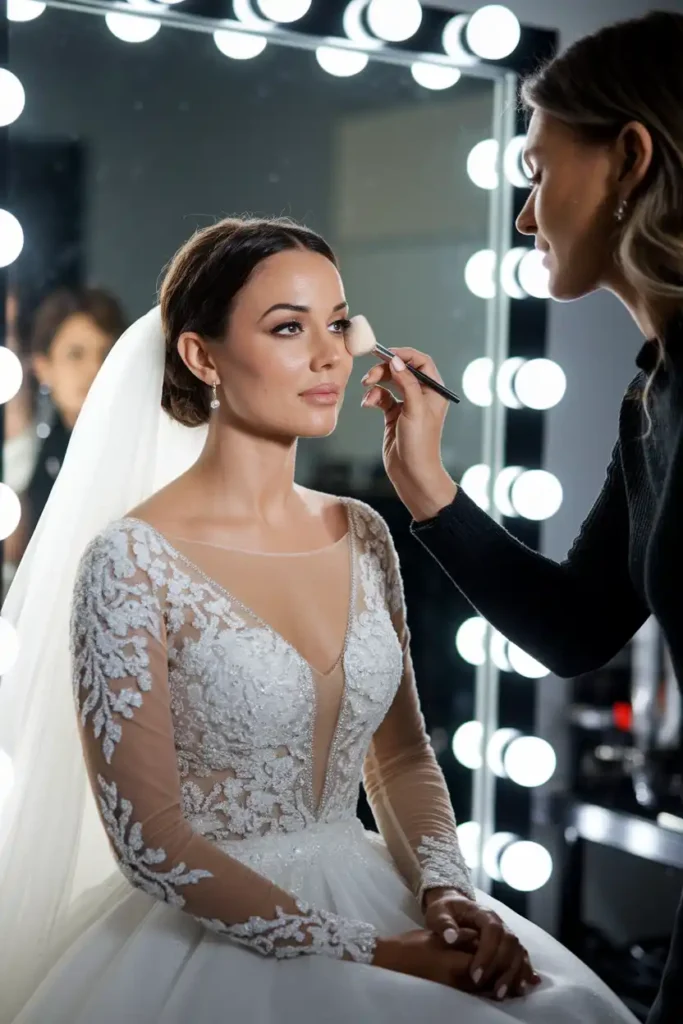
12. How to Do Your Own Bridal Makeup If You Are Not Hiring a Professional
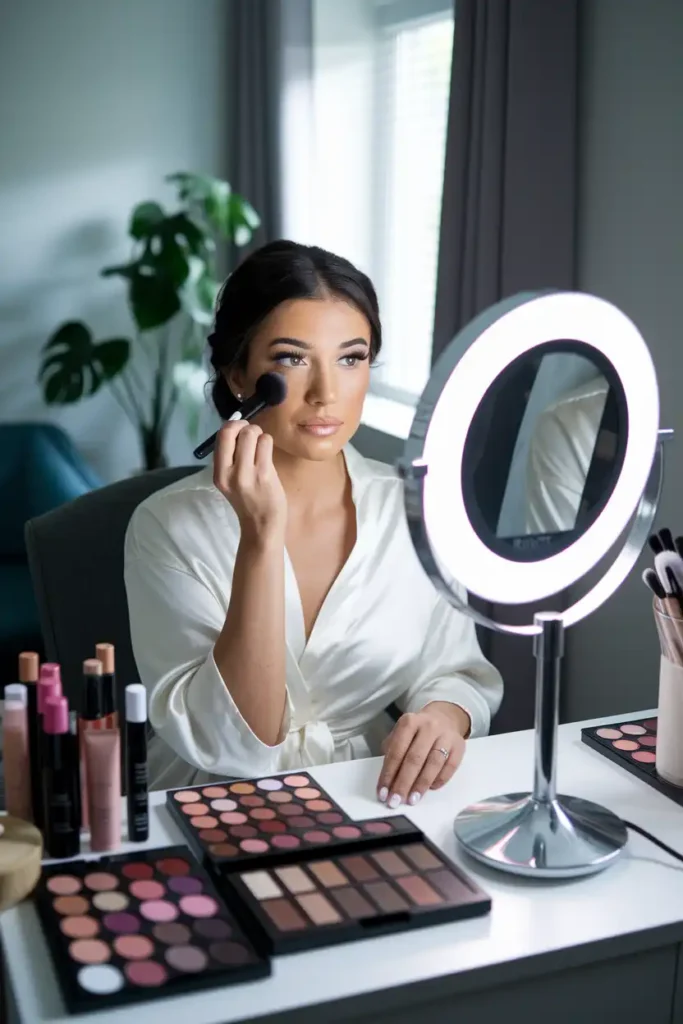
Doing your own bridal makeup is absolutely possible if you plan well. The biggest advantages professionals have are time, product knowledge, and objectivity. You can compensate for the first two with thorough preparation and honest practice runs photographed under your actual wedding lighting.
Start your practice runs at least two months out. Do a full application, photograph yourself in natural light and with flash, and note what falls apart first. Is it your concealer creasing? Your lashes drooping? Your blush fading? Address those specific issues before the wedding day. On the day itself, build in two extra hours than you think you need, lay products out in application order, and do not try anything new. Stick to exactly what worked in your trial run.
13. How to Find a Bridal Makeup Artist Who Specializes in Natural, Wearable Looks
The word “natural” in a makeup artist’s bio does not always mean what you think it means. Before booking, ask to see ten or more full-face bridal photos in different lighting, and make sure the skin in those photos looks like skin, not a filter.
When you meet for a consultation, bring your own reference photos and pay attention to whether they ask about your skin type, usual makeup habits, and what level of coverage you prefer. A good bridal artist asks questions before they pick up a brush. Also ask specifically how they handle touch-ups and whether they have experience with your skin tone. Reviews from clients with similar complexions to yours are more relevant than overall star ratings.
14. What to Pack in Your Bridal Touch-Up Kit for the Wedding Day
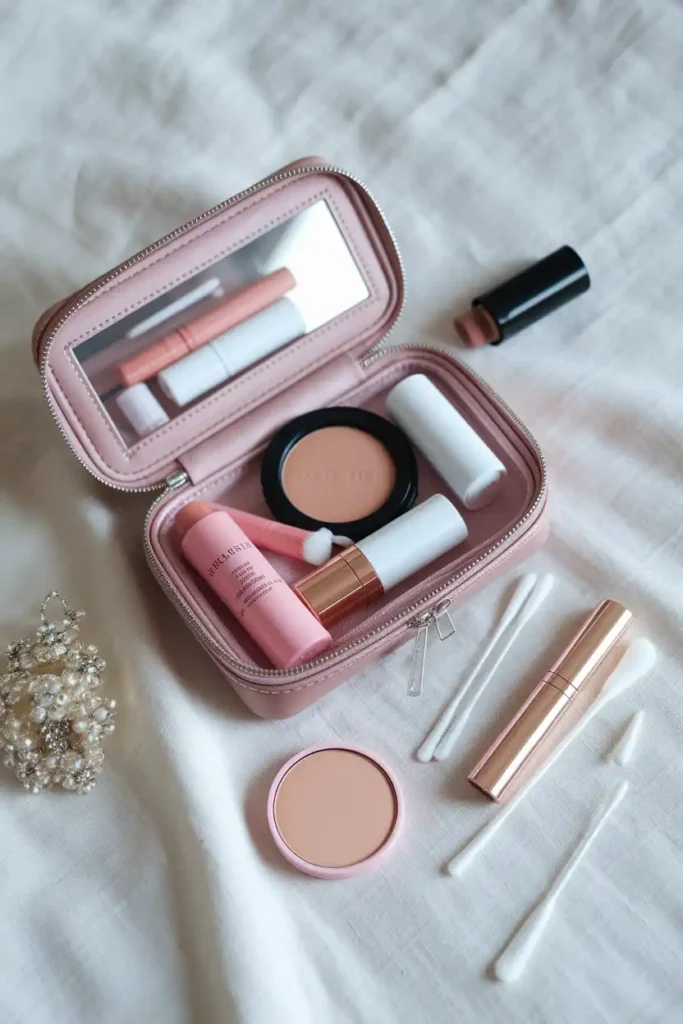
You do not need your entire makeup bag at the reception. You need a small, edited kit that handles the five most common bridal touch-up needs: shine control, lipstick reapplication, stray mascara smudges, under-eye creasing, and any blush that fades during the day.
Pack exactly these:
- Blotting papers for oil control without adding product
- Travel setting spray to refresh makeup without touching it
- Your exact lipstick or a tinted balm for touch-ups after meals
- A small concealer stick matching your foundation shade
- Clear mascara to tame brows and add a quick lash refresh
- Two or three cotton swabs for smudge corrections
- A small pressed powder only if you cannot use blotting papers alone
Ask a bridesmaid to hold the bag and be in charge of offering touch-ups so you are not thinking about it.
15. How to Make Your Bridal Makeup Look Good in Both Indoor and Outdoor Photos
Indoor and outdoor lighting are completely different challenges for makeup. Warm indoor lighting deepens colors and can make skin look more dimensional, while bright outdoor light flattens everything and exposes unblended edges, dry texture, and any product that has settled into lines.
To work well in both, keep your base medium-coverage and focus on skin prep. Avoid heavy powder, which reads well indoors but looks dusty in sunlight. Use a mix of cream and powder products for dimension, and do a test in outdoor daylight during your trial to check how everything reads. If you are having an outdoor ceremony followed by an indoor reception, your makeup artist should know this in advance so they can calibrate the finish accordingly.
16. How Skin Type Affects Your Bridal Makeup Product Choices
Your skin type is the single biggest variable in how your makeup performs. What works perfectly on dry skin can slide off oily skin within an hour, and what controls oil on combination skin can make dry skin look papery and tight.
Here is a product focus by skin type:
- Dry skin: Prioritize hydrating primer, skin tint or light-coverage serum foundation, cream blush and highlighter, avoid heavy setting powder
- Oily skin: Use a pore-minimizing primer, long-wear matte-satin foundation, set with a lightweight translucent powder, use blotting papers instead of touch-up powder
- Combination skin: Hydrate dry zones before applying foundation, use a hybrid primer, apply powder only to the T-zone, use both cream and powder products strategically
- Sensitive skin: Patch test everything at least a week before the wedding, choose fragrance-free formulas, avoid heavy silicones which can clog pores and cause irritation
Tell your makeup artist your skin type and any known sensitivities at the consultation, not on the day.
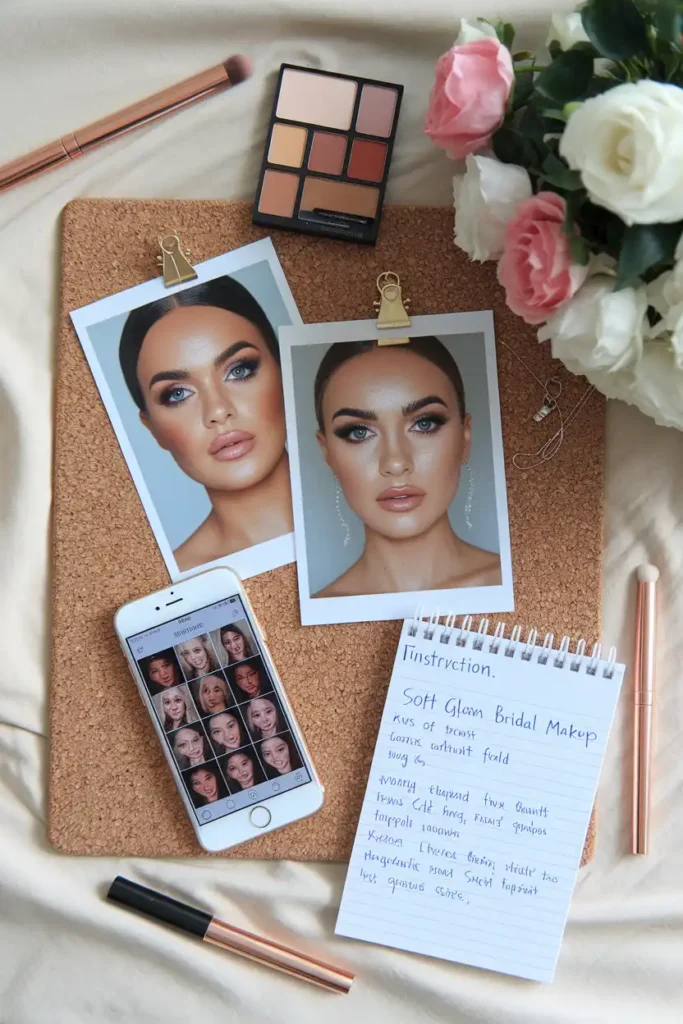
17. Why a Bridal Makeup Trial Run Is the Most Important Appointment You Will Book
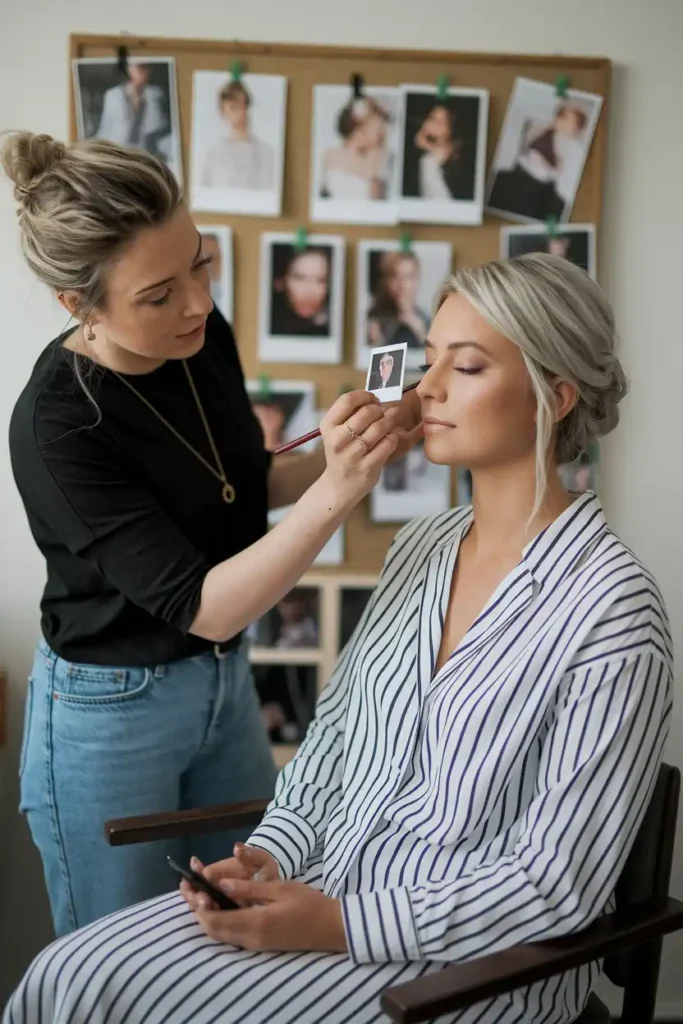
A trial run is not optional. It is where you find out what works before the day everything matters. This appointment gives you the chance to test wear time, photograph the results, and have an honest conversation about adjustments without any time pressure.
Book your trial at least six weeks before the wedding. Wear your hair in a style close to what you plan for the day, and if possible, wear a top in a similar neckline to your dress so you can see how the makeup connects. After the trial, photograph yourself in three different lighting conditions: natural daylight, indoor warm light, and with a phone flash. Those photos will tell you more honestly than a mirror whether the look is right. Bring those images to a follow-up conversation with your artist if anything needs adjusting.
18. How to Transition Your Bridal Makeup From the Ceremony to the After-Party
If you are going from a formal ceremony to a more relaxed dinner or after-party, you do not need to redo your entire look. A single product swap can shift the whole mood. Swapping your soft ceremony lip for a deeper, more saturated version of that same color family is the quickest way to signal the transition.
To make the swap work: blot your original lip completely with a tissue, apply a small amount of concealer to clean the edges, then apply your evening lip shade with a lip brush for precision. If your skin has gotten dewy throughout the day, a light press of blotting paper followed by one mist of setting spray will restore the finish without piling on more product. You do not need to start over, you just need to edit.
Conclusion:
Soft glam bridal makeup works because it is built on good preparation, the right products for your skin, and intentional layering. You do not need a full kit or a long routine. You need a clear plan and products that earn their place. Start with your trial, photograph everything, and adjust from there. Your wedding day look should feel like you, just polished and ready for whatever the day brings.