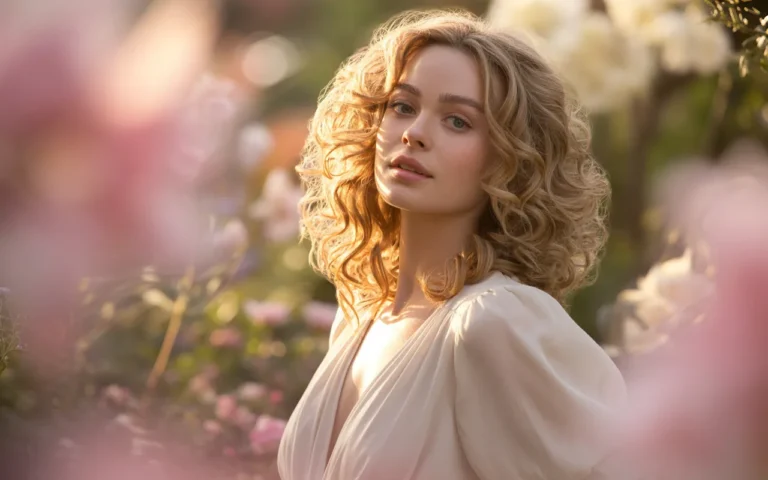
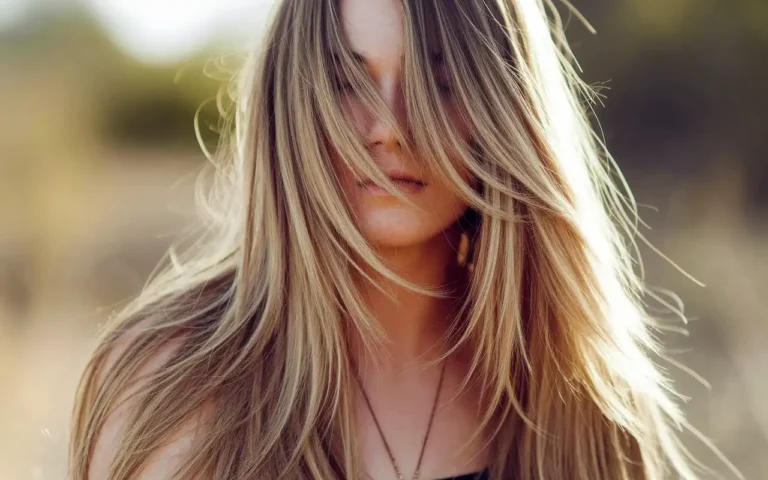
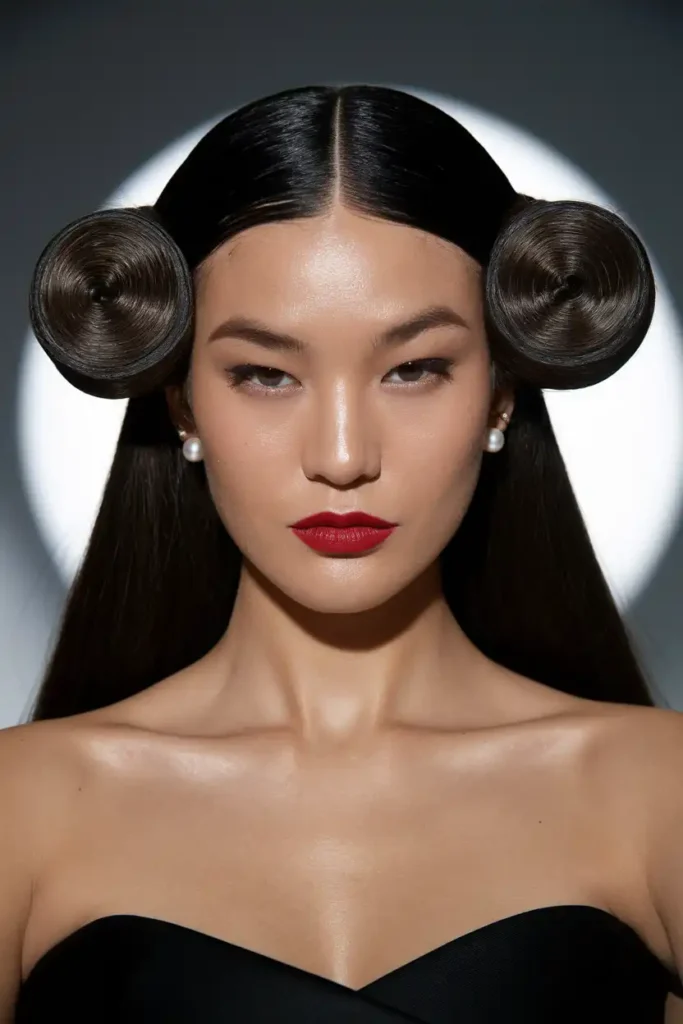
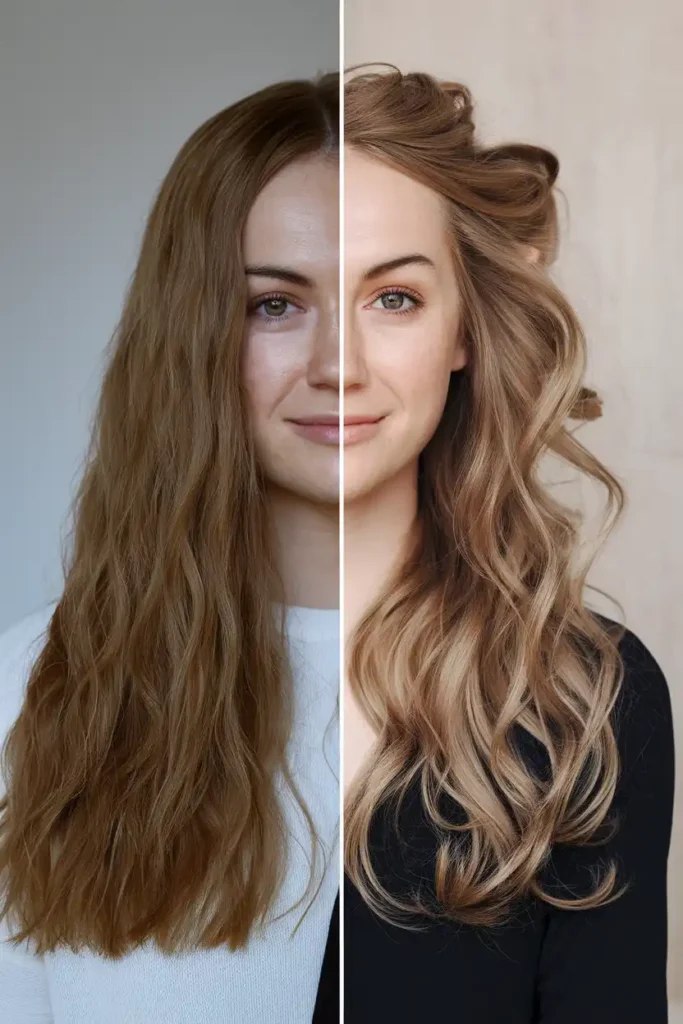
Wedding Hair Styles for Long Hair You Can DIY at Home
Your wedding day hair does not need to cost $300 at a salon. The right hair styles for long hair are simpler than most tutorials make them look, and you can pull them off at home with basic tools you already own. This guide covers 20 real styles, from soft updos and braided crowns to loose waves and vintage-inspired looks. Each one is practical, tested, and genuinely doable without professional hands. Start here.
1. How to Prep Your Hair the Night Before Your Wedding
The day before your wedding is the most important prep window you have. Wash your hair the night before, not the morning of. Fresh hair is too slippery to hold most styles, especially updos and braids. Hair with one day of natural oil grips better and holds longer.
- Apply a lightweight serum to your ends before bed
- Sleep on a silk pillowcase to reduce frizz
- Loosely braid your hair overnight to create natural texture
- Avoid heavy conditioner on your roots the day you wash
Detangle gently with a wide-tooth comb before you start any styling the next morning.
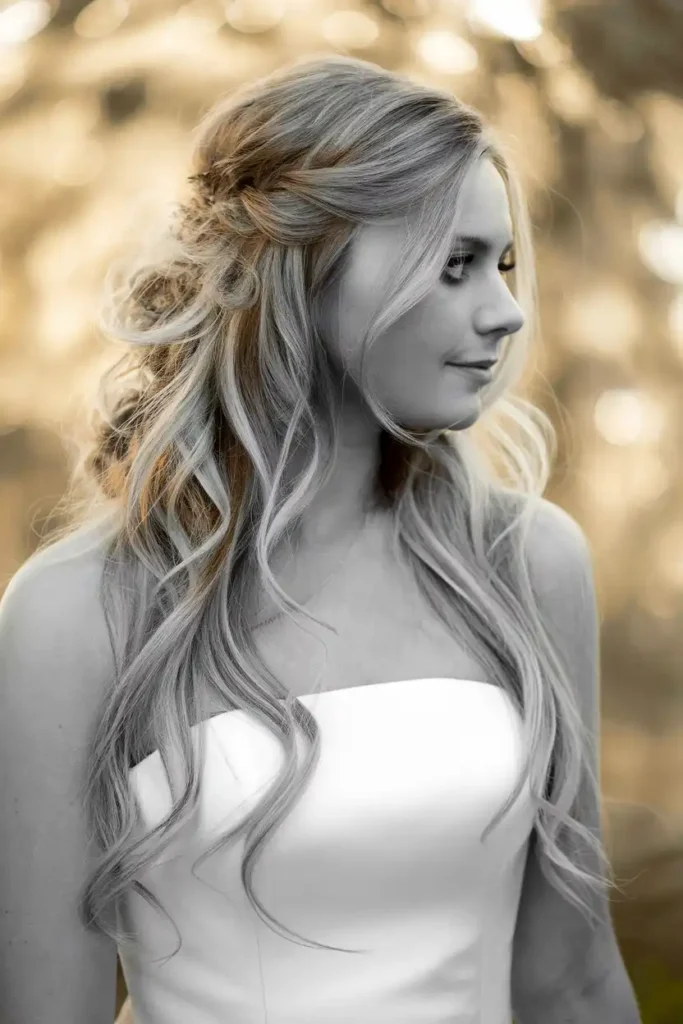
2. Classic Half-Up Hair Styles for Long Hair Brides
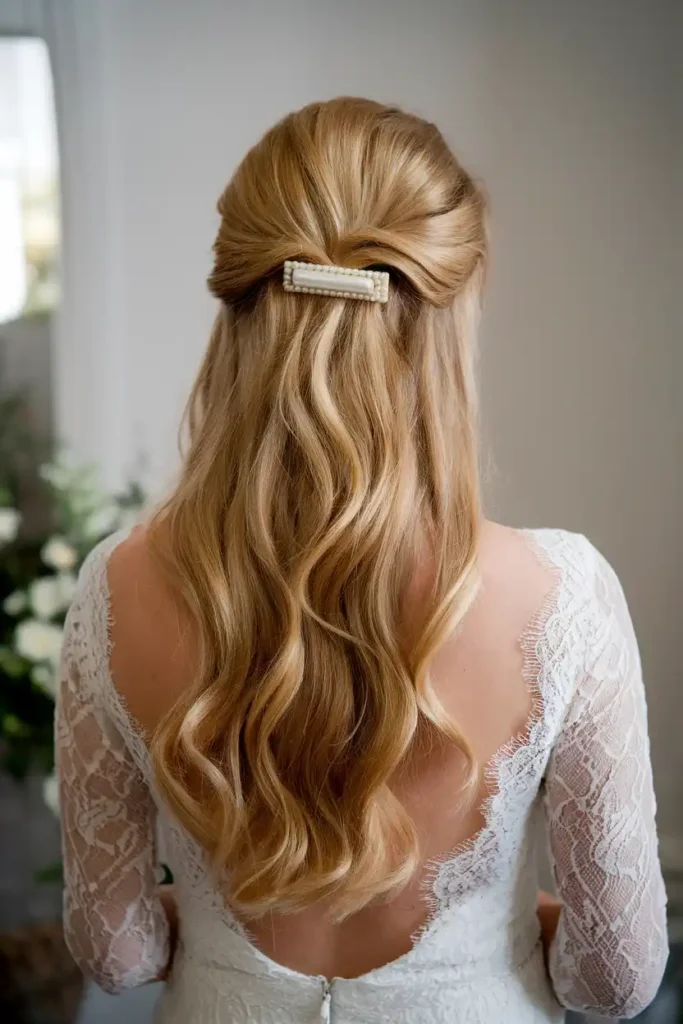
The half-up style works for almost every wedding setting, from a backyard ceremony to a formal church wedding. You pull back the top two sections, pin them at the crown, and leave the rest loose. That is it. The result looks polished without needing a single bobby pin technique you have to master from scratch.
- Use a pearl or crystal clip for instant bridal feel
- Curl your ends the night before for effortless waves
- Tease the crown section lightly before pinning for volume
- Mist with a flexible-hold spray, not a stiff one
This style takes about 10 minutes and photographs beautifully from every angle.
3. Soft Updo Hair Up Styles for Long Hair Without a Stylist
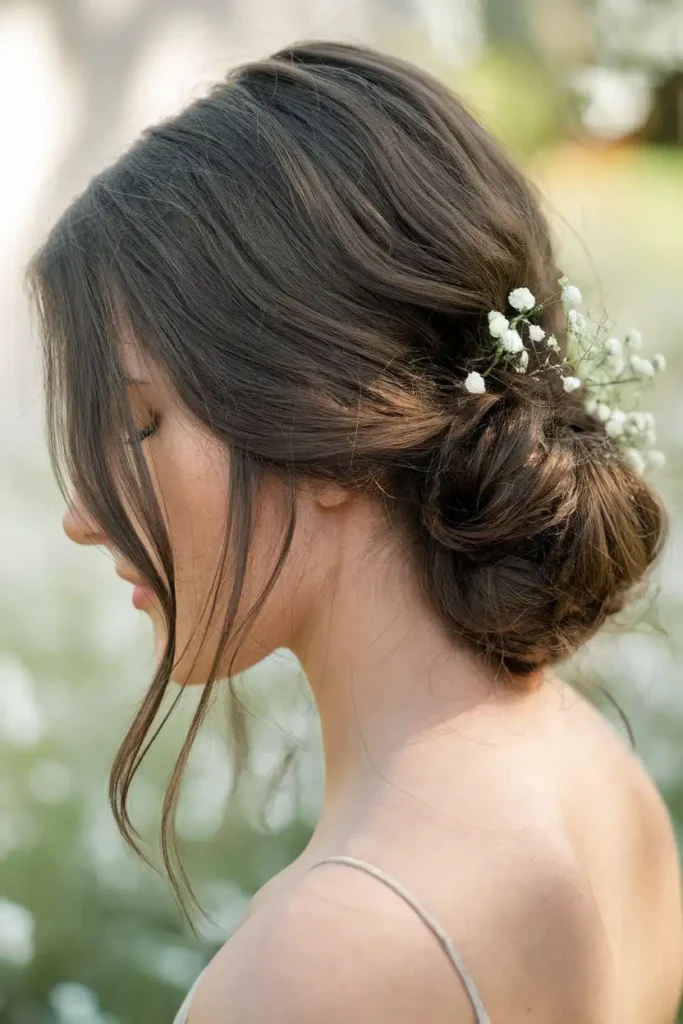
A low bun is the most forgiving updo you can do yourself. You do not need a professional for this. Gather your hair at the nape of your neck, twist it loosely, and wrap it into a soft bun. Pull a few pieces free around your face. That imperfection is exactly what makes it look intentional.
- Secure with a clear elastic first, then tuck and pin
- Use U-shaped pins instead of bobby pins for a stronger hold
- Pull the bun apart slightly after pinning to make it look fuller
- Set with a shine spray, not a matte one, for a bridal finish
Practice this once before the wedding day so your hands know what they are doing.
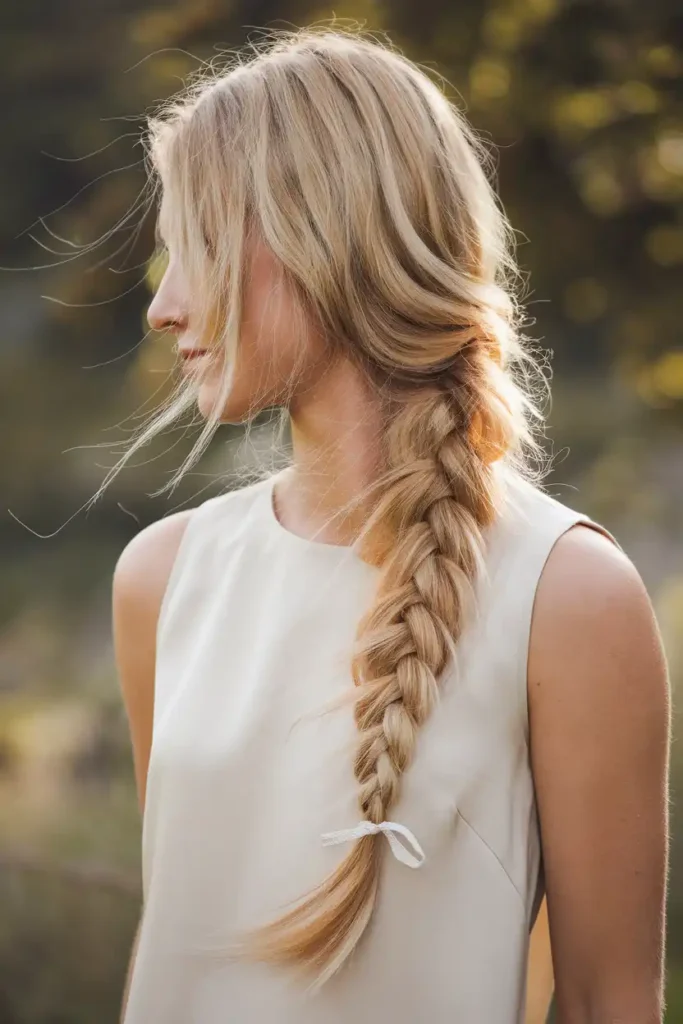
4. Easy Braid Styles That Look Expensive on Long Hair
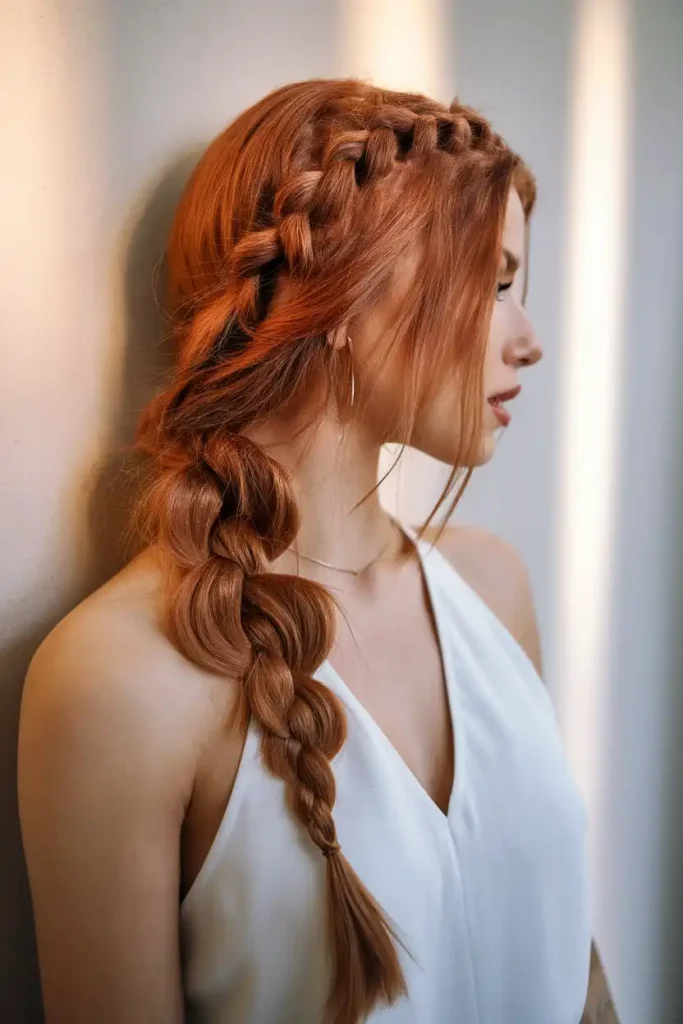
A loose Dutch braid along the side of your head looks far more complex than it actually is. You cross the sections under instead of over, which creates that raised, 3D braid sitting on top. Once you pass the ear, you can let the rest hang as a low ponytail or tuck it into a small bun.
- Braid on second-day hair for better grip and texture
- Pull each section gently outward after braiding to widen the braid
- Secure the end with a small elastic that matches your hair color
- Add a small floral pin at the base where the braid ends
Watch one tutorial on Dutch braiding the night before. Ten minutes of practice makes a real difference.
5. 1920s Hair Styles for Long Hair That Work for a Modern Wedding
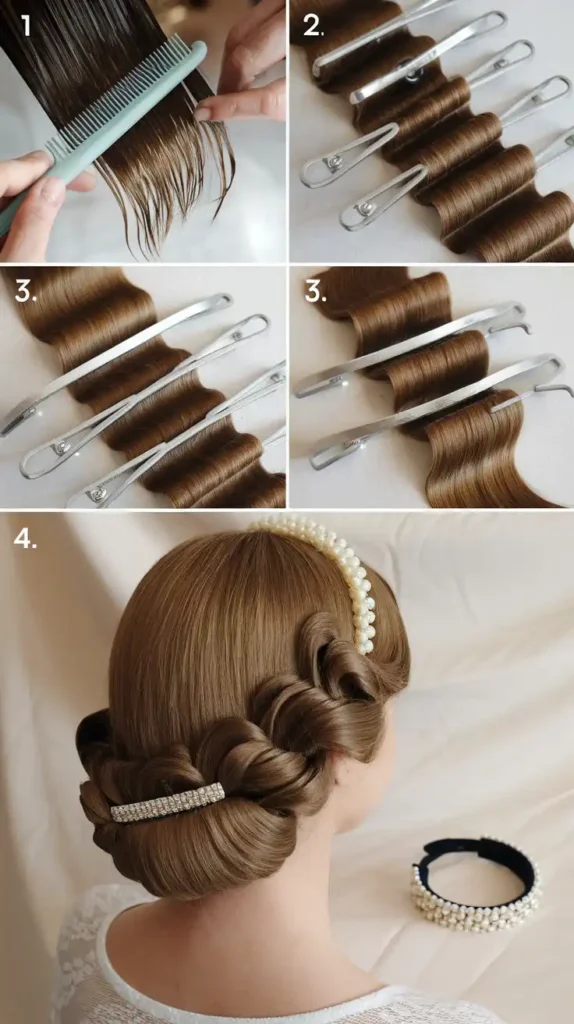
The 1920s style is built on finger waves, which are S-shaped waves shaped by hand and set with clips. You do not need a curling iron for this. You need a fine-tooth comb, strong-hold gel, and wave clips.
Step-by-step guide:
- Start with damp, freshly washed hair
- Apply a small amount of strong-hold gel or wave cream through your hair
- Use your comb to push the hair into an S-curve near the hairline
- Place a wave clip at the top of each curve to hold it in place
- Repeat moving backward across the head in rows
- Leave clips in for at least 40 minutes or sit under a hooded dryer
- Remove clips carefully, do not disturb the waves
- Pin the back sections into a smooth, low chignon
- Finish with a light-hold spray to keep the waves intact
Pair with a rhinestone clip or thin pearl headband to complete the bridal look.
6. Hair Styles for Long Hair With Layers: What Actually Works for Weddings
Layered long hair curls differently than one-length hair. Your layers will naturally separate as the curls dry, which creates that full, effortless bridal wave without much effort. Work with that instead of fighting it.
- Curl away from your face on all sections for a consistent look
- Use a 1.25-inch barrel for waves, not tight ringlets
- Let curls cool completely before running fingers through them
- Apply a touch of cream to your layers to define them without stiffness
Layered hair holds a half-up style particularly well because the shorter pieces frame your face naturally when pinned back.
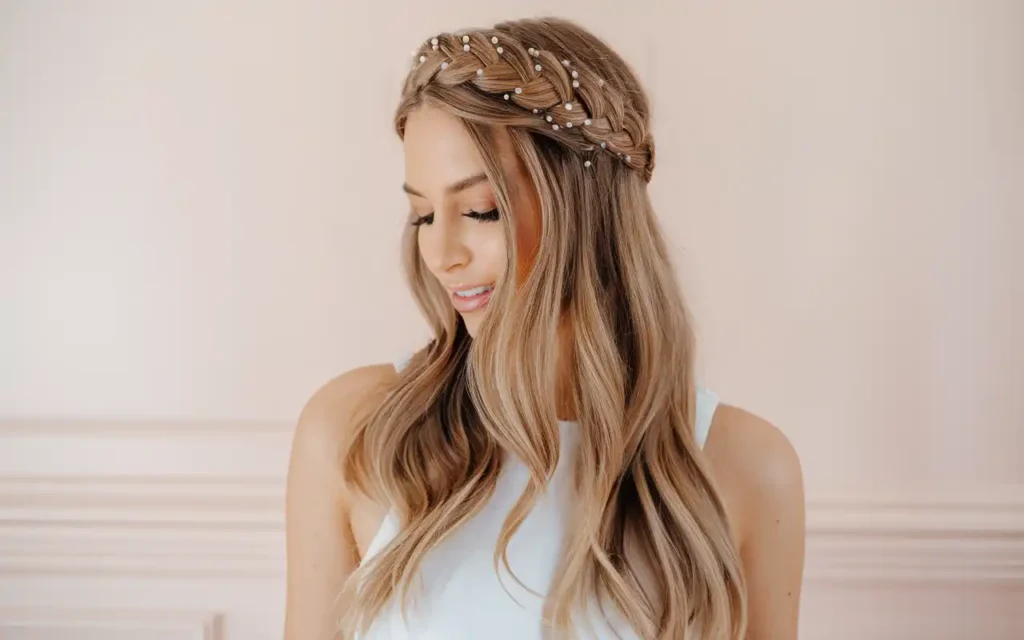
7. Simple Braided Crown Style for a Romantic Wedding Look

The braided crown sounds intimidating but it is really just two braids pinned across the top of your head. Braid one section from behind your left ear, bring it across, and pin it behind your right ear. Repeat on the other side. The two braids cross at the top and create a crown effect.
- Work on hair with some texture, not freshly washed
- Use bobby pins that match your hair color so they disappear
- Tuck the ends under the opposite braid before pinning
- Add small pearl or floral pins along the braid for a bridal touch
This style holds well without hairspray if you have enough pins in the right places.
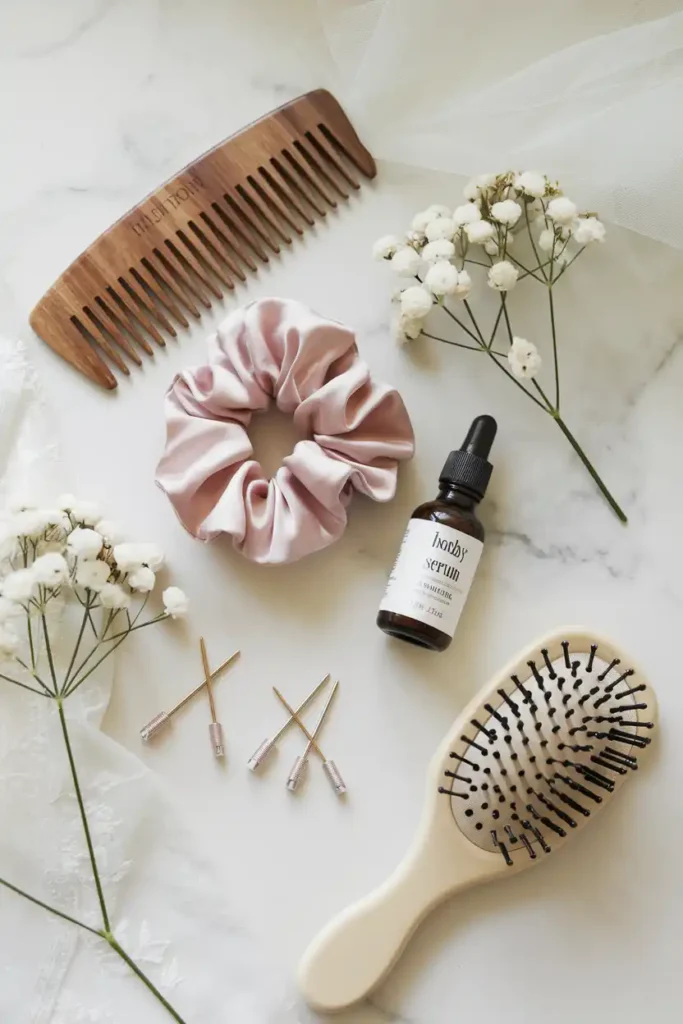
8. Hair Accessories for Elegant Long Hairstyles
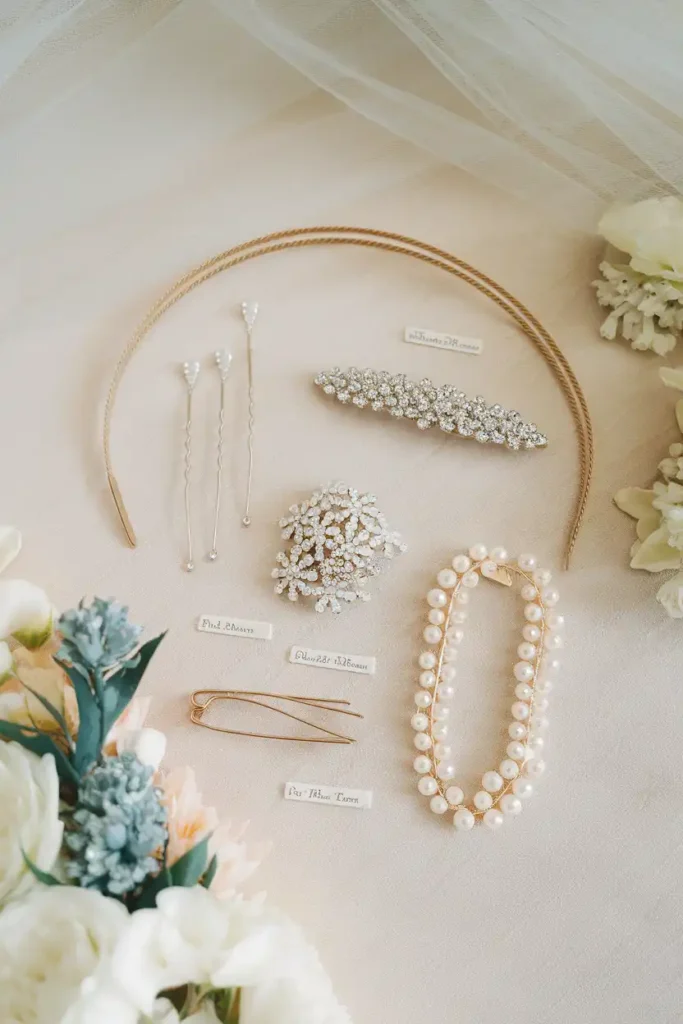
The right accessory can take a basic hairstyle and make it look bridal in seconds. You do not need a complex style. A simple low bun with a rhinestone barrette reads as completely polished and intentional.
- Thin headbands work best on half-up styles and loose waves
- Floral pins suit braids, buns, and any style with texture
- Rhinestone clips photograph well and catch light beautifully
- Pearl U-pins are the most versatile, use them in any style
Buy your accessories before you practice your hairstyle so you can test how they sit in the style and whether they hold through movement.
9. Choose the Best Hairbrush for Long Hair Detangling Before Styling
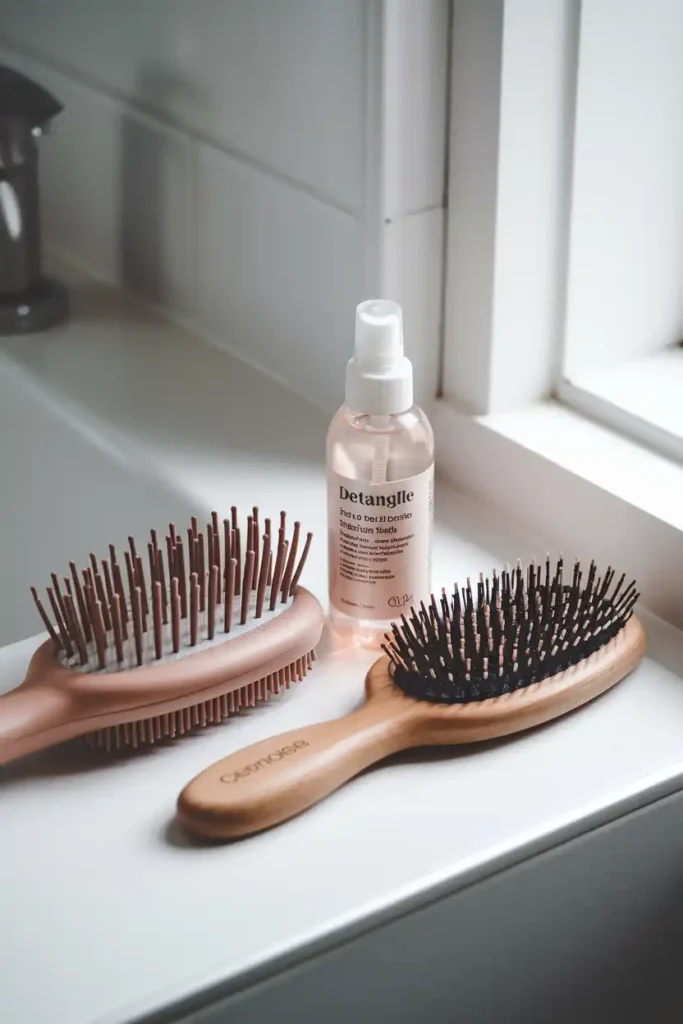
Using the wrong brush on long hair before styling causes frizz, breakage, and a messy base that no style can fix. A cushion-base detangling brush is your safest starting point. The flexible bristles move through knots without snapping your hair.
- Use a detangling spray on damp hair before brushing
- Start from your ends and work upward in sections
- Switch to a boar bristle brush when your hair is fully dry for smoothing
- Never brush your hair dry from root to tip in one stroke
A boar bristle brush distributes natural oil from root to end, which adds shine before you style. It is worth keeping both brushes in your kit.
10. Low Ponytail Styles That Look Bridal on Long Hair
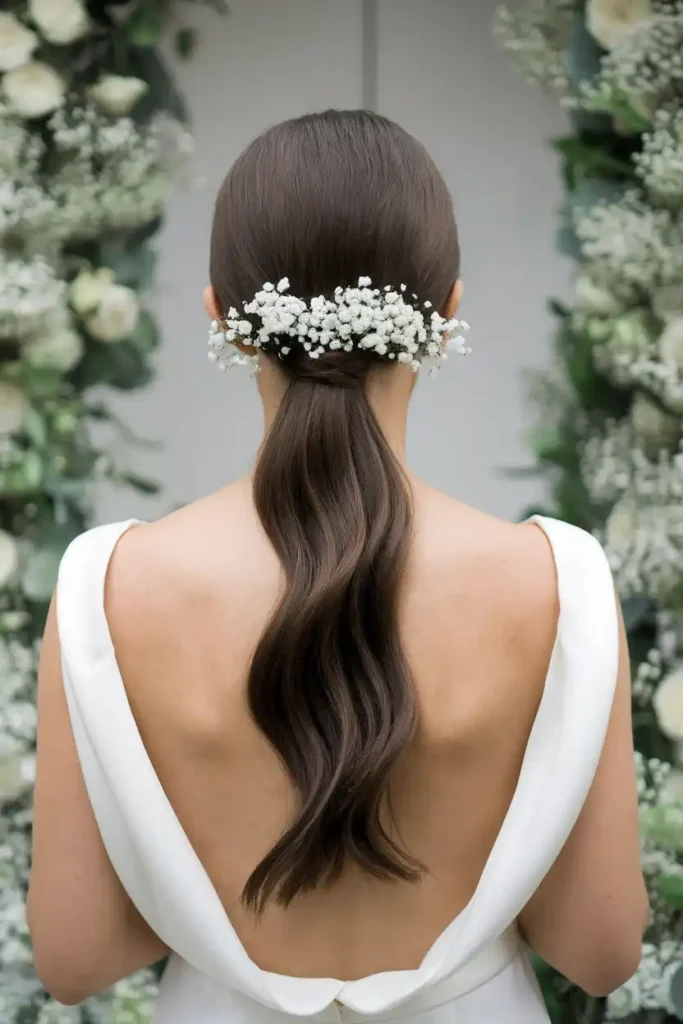
A low ponytail at the nape of the neck is one of the cleanest DIY bridal styles you can create in under 15 minutes. The key detail is wrapping a small section of hair around the elastic. That one step makes it look finished instead of casual.
- Smooth the top of your hair with a fine-tooth comb and a tiny amount of gel
- Secure with a snag-free elastic, not a rubber band
- Wrap a thin section around the base and pin it underneath
- Add flowers, a clip, or a ribbon at the base for a bridal touch
Keep the tail straight and use a shine spray along the length for a polished finish.
11. Loose Waves: The Easiest Long Bridal Style for Beginners
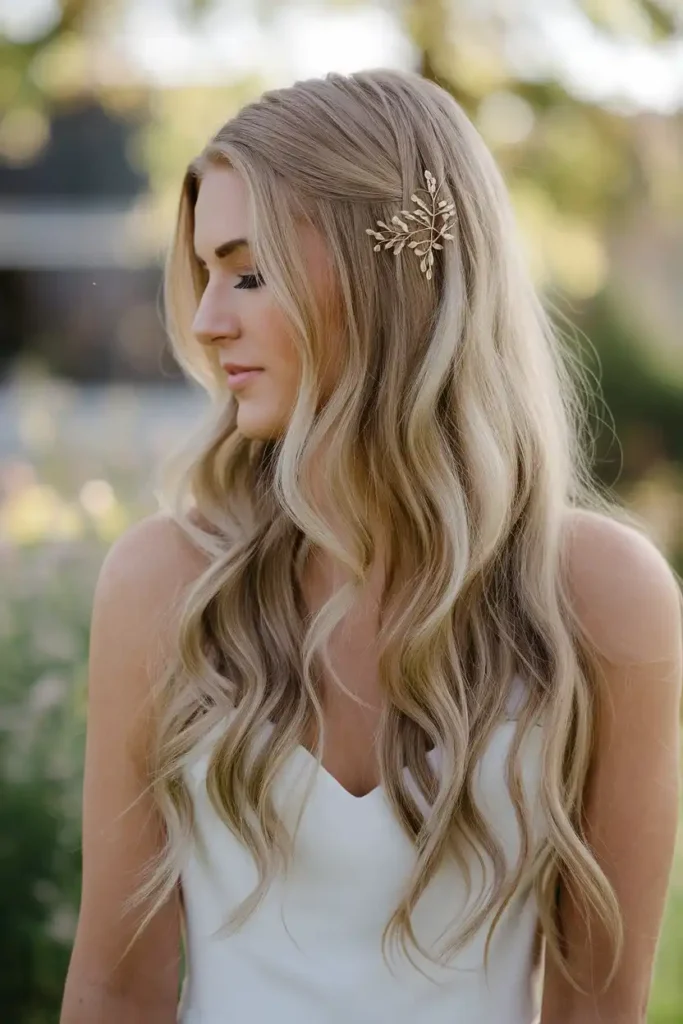
If you are genuinely not confident styling your own hair, loose waves are your answer. They are hard to get wrong. Curl random sections with a 1.5-inch iron, alternate the direction of each curl, and shake them out once cool.
- Do not curl every section perfectly, the unevenness looks natural
- Use a texturizing spray after curling for grip and separation
- Tuck one side behind your ear and pin it with a decorative clip
- Finish with a flexible hold spray, not a lacquer
This works on every hair type and looks as good at the end of the night as it does at the start.
12. Vintage-Inspired Victory Rolls for a Statement Bridal Look
Victory rolls are a 1940s style but they fit perfectly into modern vintage weddings. You roll the front sections of your hair forward and under, then pin them in place. The shape holds better on hair with some product in it.
- Start with dried hair and apply a smoothing cream before rolling
- Backcomb the section slightly before rolling for more volume in the roll
- Use several bobby pins placed along the inside of the roll
- Smooth the outer surface with a fine-tooth comb and light gel
Pair with a sleek low chignon at the back to keep the focus on the front detail.
13. French Twist Tutorial for Long Hair Brides

The French twist looks harder than it is. You gather all your hair to one side, roll it vertically against the back of your head, and tuck the ends in at the top. Pin along the fold as you roll upward to keep it in place.
- Work with hair that has some product, not freshly washed
- Use long, straight pins along the center fold rather than bobby pins
- Tuck the ends inside the top of the twist and secure with a clip
- Pull two or three face-framing pieces loose at the front before starting
A French twist holds through most of the day if you use enough pins and a light mist of flexible hold spray at the end.
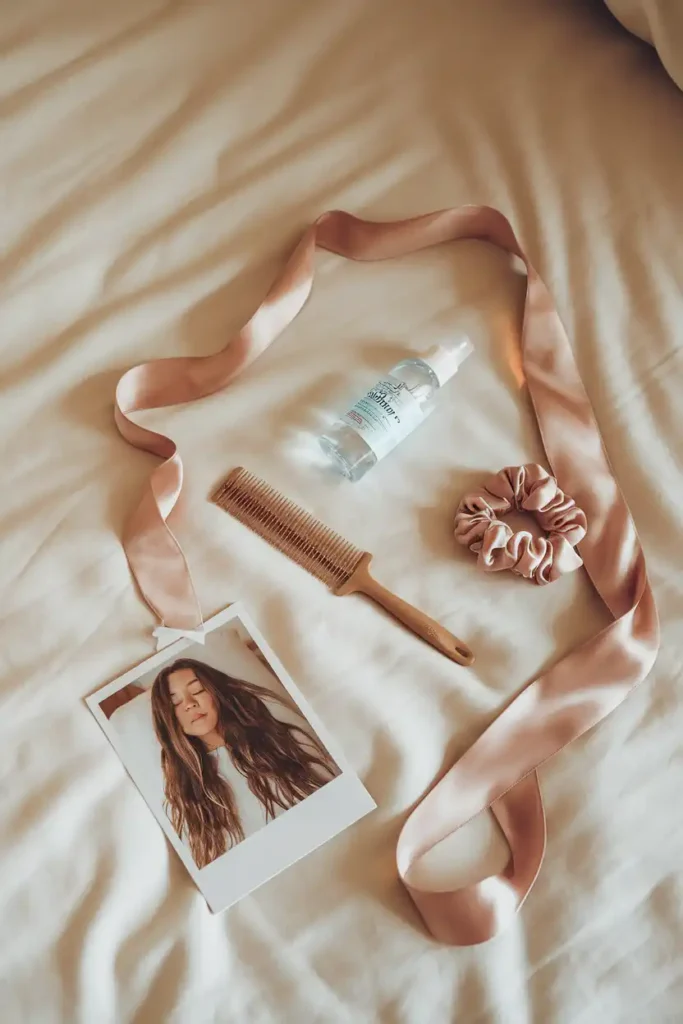
14. How to Keep Your Wedding Hairstyle in Place All Day
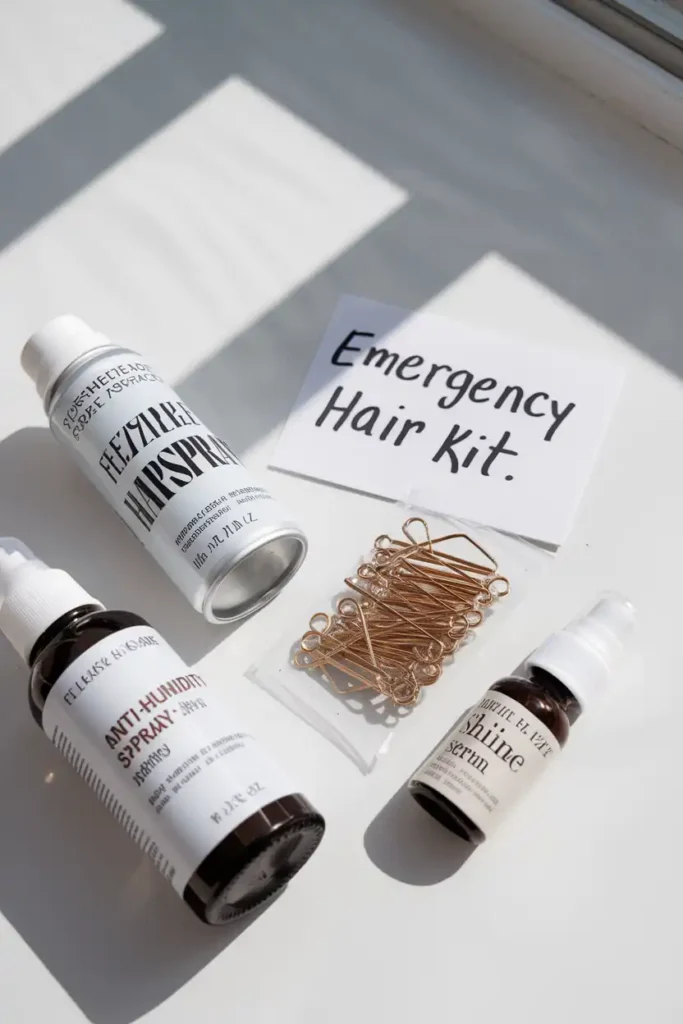
The biggest fear with DIY bridal styles is the style falling apart before the reception. Humidity, dancing, and heat all work against you. The solution is layering hold products rather than relying on one heavy spray.
- Apply a light mousse or texturizing spray before styling as your base
- Use an anti-humidity spray if your wedding is outdoors or in summer
- Pin more than you think you need, extra pins do not hurt
- Pack a small emergency kit: pins, a travel spray, and a comb
Mist your finished style from at least 12 inches away. Spraying too close creates stiffness and white residue.
15. Side-Swept Style for Long Hair With a Veil
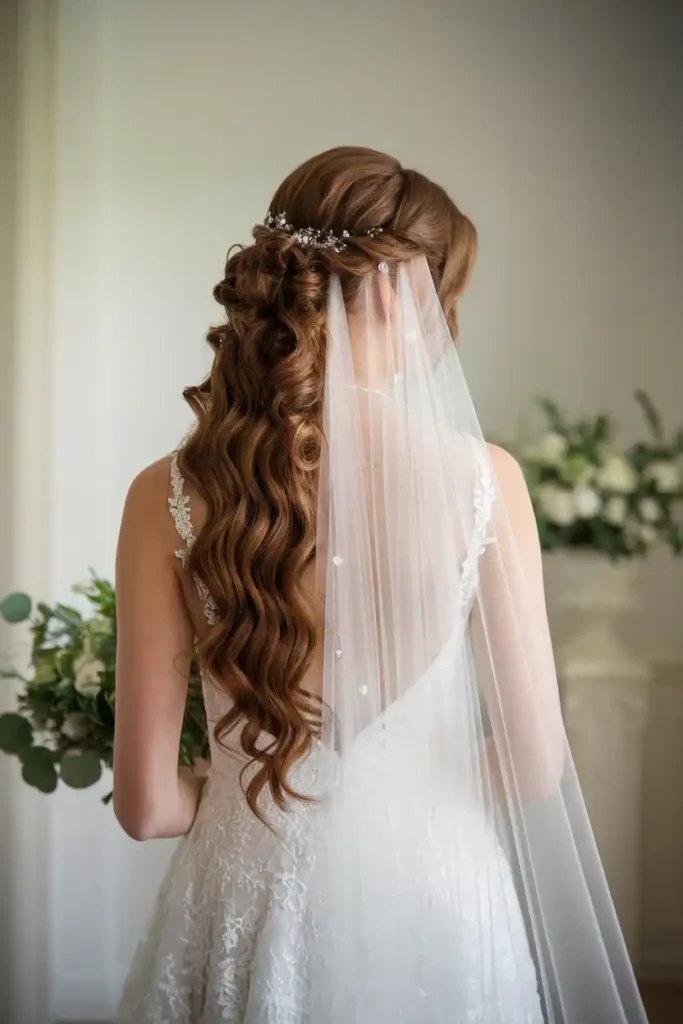
Content: Wearing a veil changes how you plan your hairstyle. The veil needs an anchor point, usually the crown or the back of the head. A side-swept style works beautifully with a veil because the two elements sit in different visual zones and do not compete with each other.
- Attach the veil comb to a small base of crossed bobby pins for a stronger hold
- Place the veil before you finalize your style to adjust accordingly
- Curl your hair first, sweep it to one side, and pin loosely at the shoulder
- Use a crystal pin or two at the veil attachment point to make it look intentional
Practice attaching and removing the veil at least once before your wedding day.
16. Textured Fishtail Braid for a Boho Wedding
A fishtail braid looks intricate but the actual technique is repetitive and simple once you understand it. You split your hair into two sections, take a thin piece from the outside of one section, and cross it to the other. Repeat. That is the entire method.
- Work in sections of no more than half an inch for a tighter, neater braid
- Pull the sides of each section outward after braiding to create fullness
- Use a small, matching elastic or a ribbon to tie off the end
- Spray the finished braid lightly to tame any flyaways without flattening the texture
A fishtail braid on second-day hair holds better and looks more textured than on freshly washed hair.
17. How to Add Volume to Fine Long Hair for Your Wedding Day
Content: Fine long hair loses volume fast, especially on a stressful day when you are likely touching it more than usual. The fix starts before you even pick up a curling iron. Use a volumizing mousse on damp hair, scrunch it in, and let your hair air dry or diffuse it.
- Backcomb the crown section in small parts before any styling
- Curl upward from the root, not just the mid-length and ends
- Avoid heavy serums on your roots, they weigh fine hair down fast
- Use a dry shampoo at the roots before styling, even on clean hair, for grip
Set your style with a volumizing spray, not a shine spray. Shine sprays are designed for thick hair and can make fine hair look flat within an hour.
18. Pinned-Back Styles Using Floral Pins for Long Hair
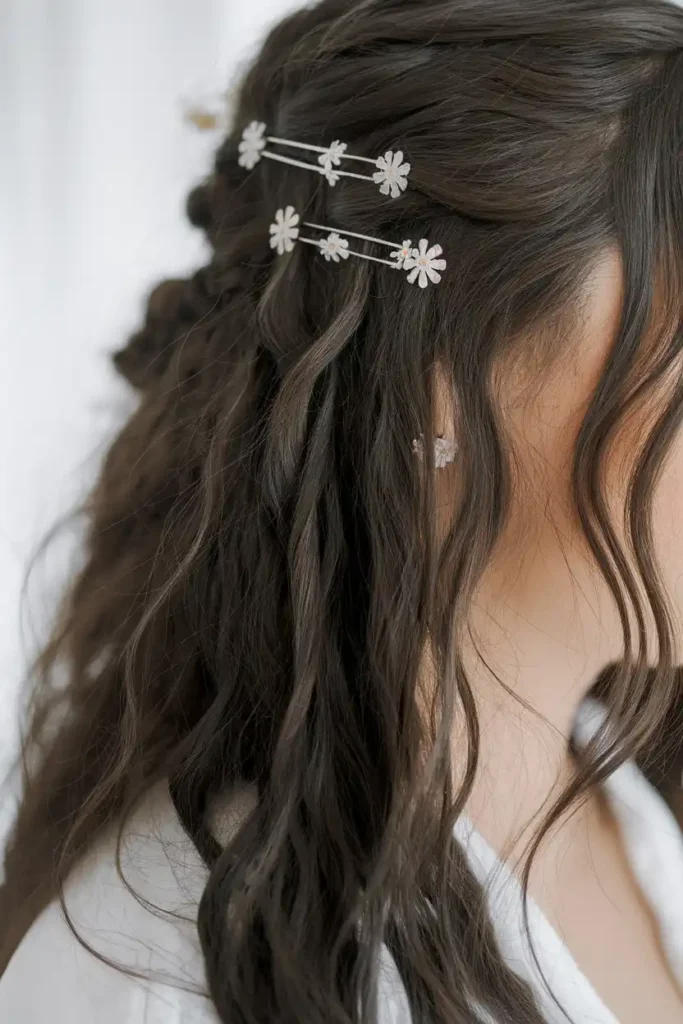
Floral pins are one of the easiest ways to take a plain loose style and make it look like a proper bridal look. Pin back the front sections on both sides, press a few floral pins into the body of the style, and your hair is done.
- Buy pins with a secure clasp, cheap pins fall out during the day
- Place pins into sections that have some texture or curl, they grip better
- Use an odd number of pins, three or five looks more natural than four
- Vary the placement so they are not evenly spaced, scattered looks more organic
Floral pins work on every style including loose waves, braids, low buns, and half-up styles.
19. Overnight Heatless Curls for Long Hair Before the Wedding
Heatless curls done overnight are one of the best choices for a DIY wedding style. Your hair gets natural, soft waves without the heat damage, and you wake up with the hard part already done.
- Start with slightly damp hair for the best wave result
- Drape a satin ribbon or robe tie across the top of your head
- Wrap sections of hair over and under the ribbon alternately, working toward your ear
- Secure each end with a scrunchie and sleep on your silk pillowcase
Remove the ribbon carefully in the morning, separate the waves with your fingers, and set with a flexible spray. The result is soft, bridal, and completely damage-free.
20. How to Choose the Right Style for Your Wedding Dress Neckline
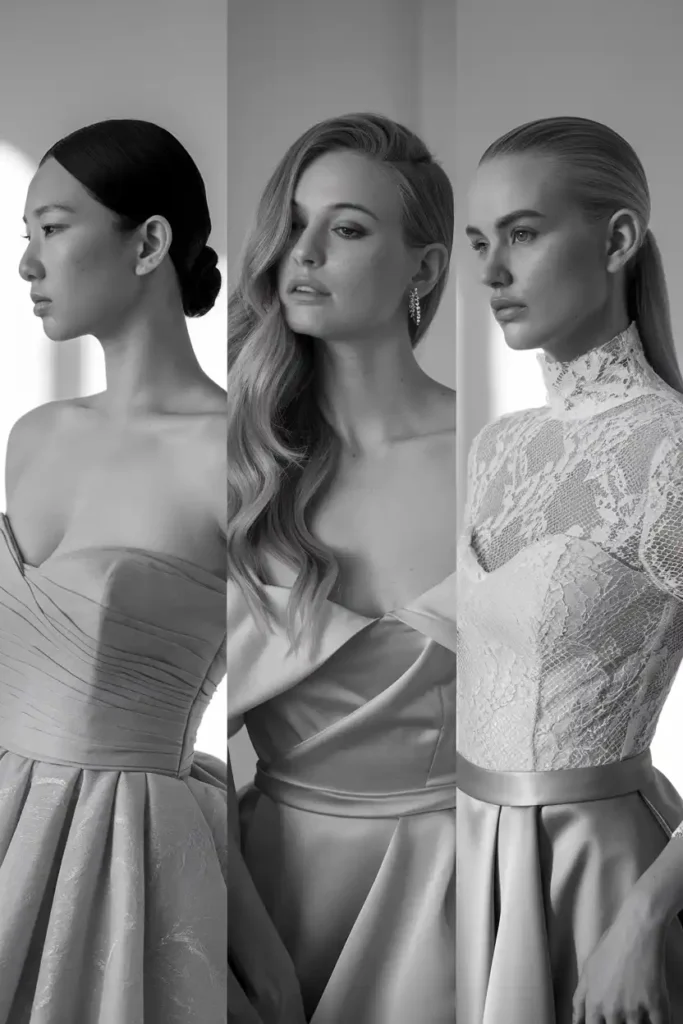
Your dress neckline should directly influence the hairstyle you choose. Strapless and off-the-shoulder necklines benefit from an updo or half-up style that draws attention to your shoulders and collarbone. High necklines pair better with loose, flowing styles that add softness around the face.
- Strapless gown: low bun, French twist, or updo
- Off-the-shoulder: loose waves, side-swept curls, or a fishtail braid
- V-neck: half-up styles or a sleek low ponytail
- High neck or lace collar: loose waves down or a simple side braid
Try your hair style while wearing the actual dress, or at least the neckline style, before the wedding day. What looks good in a mirror wearing a t-shirt can look completely different in your gown.
Conclusion:
You do not need a stylist to walk down the aisle with beautiful hair. These styles work on real hair, in real homes, without a salon kit. Pick one style, practice it once the week before, and you are ready. The tools are simple. The techniques are straightforward. Your hair will hold. Trust the prep work you put in, and enjoy the day.